
Every wrapped package deserves a fabulous bow and a bottle of red wine deserves it's own fur coat and vintage broach. I love to see a friend's reaction when presented with a gift I've lovingly wrapped. Why should anything be boring?
I have this condition where I try to change things that are plain or boring. It's a little bit obnoxious. If I see ecru curtains I imagine adding a colorful border to the hem. When I make Alfredo sauce, I add cayenne pepper to give it a kick and add a little color. And when I buy a floor lamp for my living room, I recover the plain white shade.

I had been looking for a floor lamp for our living room so I headed out to the local big box store. {We'll call this store Bullseye} How many people have one of these lamps with a generic white shade? When I walked down the lamp aisle I didn't see white shades. I saw possibility. I opted for an overhanging model with a drum shade. I knew the shade shape would be easy to recreate. But I needed fabric and cheap, so off to the shower curtain aisle.

This is my favorite section at Bullseye, my equivalent of the "Toy Aisle" as a kid. I have used fabric shower curtains for tons of projects including but not limited to Halloween costumes, toss pillows, room dividers, table cloths and of course lamp shades. The first place to look is always the aisle end cap. This is where they put the hidden treasures...clearance items.
This particular shower curtain was originally $49.00, I got it for $4.95 {actually, I bought 2 at this price}. I made one last stop at the dollar store to get a package of wooden clothes pins {the kind that open when you pinch them} and some glue sticks for my glue gun.

Once you get the lamp out of the box and assembled, get out a measuring tape and measure the circumference and the height of the shade. {If your shade is tapered, your measuring process will be different} Mark the dimensions on your fabric/shower curtain adding 1/2" for seam allowance and gluing on each side. If there's a specific pattern, pay attention to what's the top and what's the bottom. {You may or may not notice that my little birdie could be facing a bettor direction if I'd paid better attention to this.} You'll have a rectangle whose dimensions will be the height of the shade X the circumference plus 1/2 inch on all sides. Cut out the rectangle. Fold your fabric in half with the right sides together. Pin the fabric to keep it in place and sew a straight stitch using 1/2" seam allowance. You can use a sewing machine or you'll need to sew your seam by hand. Turn right side out and voila! You've just created a custom shade cover!!!
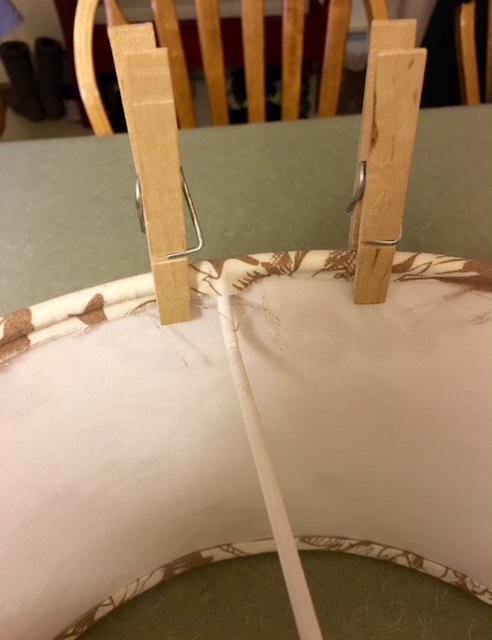
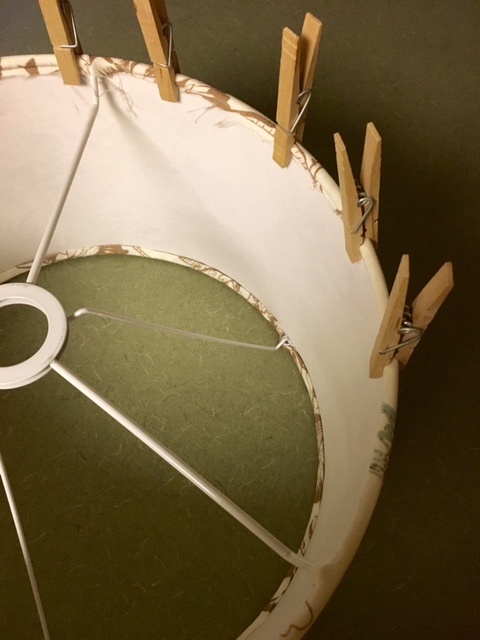
Slide the cover over the existing shade. {Because the lamp comes with a white shade, you don't have to remove it. There's no pattern to show through your custom shade.} Heat up your glue gun. Once you have your custom shade cover in place, start by folding the fabric over the top of the shade frame and place glue on the inside rim. Press the fabric down and use a wooden clothes pin to hold the fabric in place until the glue dries. I recommend gluing the fabric in one spot, then in the same spot on the bottom. Move to the opposite side of the shade and do the same. This prevents the cover from ending up too short in some spots. I leave the clothespins on until the job is finished.
Remove the clothespins and trim away any excess fabric. Your custom lamp shade is finished! Mine cost $6.95 with tons of fabric left over for other projects. {I used a small piece to decoupage a switch plate cover for my bathroom.}


The next time you're looking for that certain accessory for your home, go with an open mind. Most stores sell items in neutral colors so that they will appeal to a vast majority. Try to see the possibility.
In a vanilla world, I see sprinkles.
You Can Do It!
No comments:
Post a Comment